
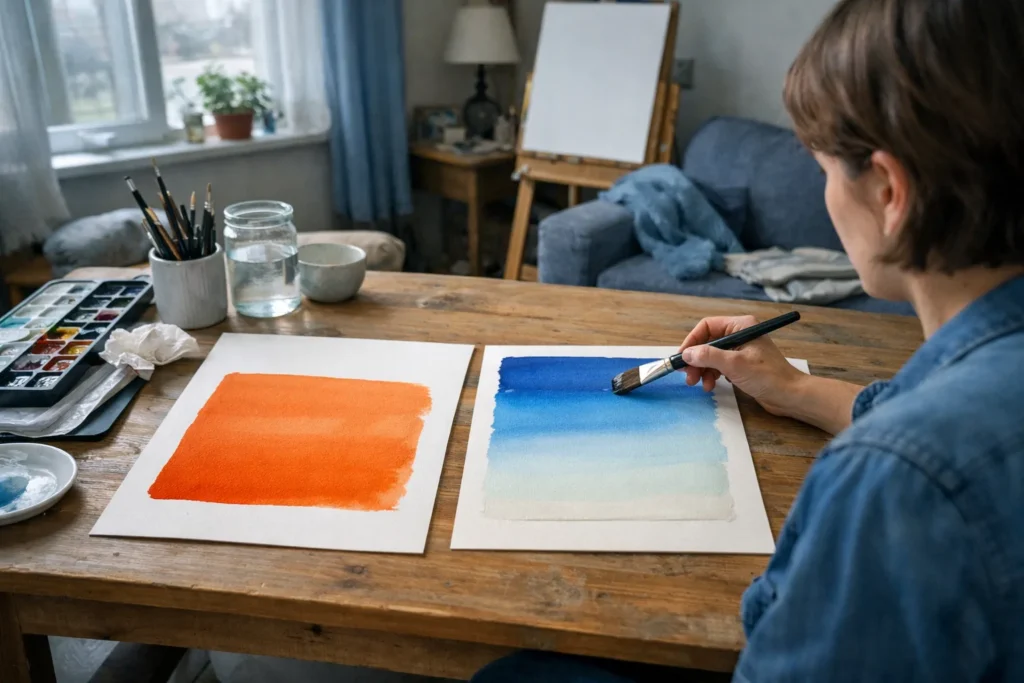
Almost every watercolor painting starts with a wash, a smooth layer of color across a large area. A sky, a lake, or the background of a card all rely on it. The two basic versions are the flat wash, which stays the same color from edge to edge, and the graded wash, which fades from dark to light. Both are easy to learn with a pencil, a brush, and an afternoon.
The exercises below work on any cold-press watercolor paper. If you live in Wisconsin, or anywhere with dry winters, pay attention to how quickly paint dries on the sheet. Dry air shortens your working time, so mix more paint than you think you need.
Prepare your paper and board
Use paper labeled for watercolor, at least 140 lb (300 gsm), so it does not buckle. Cut a sheet to about 8 by 10 inches (20 by 25 cm). To keep it flat, tape the edges to a board with painter’s tape, or soak the sheet in clean water, blot it, and tape it down while it is damp. As it dries, it tightens like a drum.
Draw a rectangle about 6 by 8 inches (15 by 20 cm) lightly in pencil on the paper. You will paint inside the box, and the edges of the tape help keep the edges tidy.
The flat wash, step by step
- Mix more paint than you need. Make a puddle of about a tablespoon in a small dish. Run out halfway, and the wash will show a line.
- Tilt the board. Prop the top of the board on a book so it sits at an angle of about 10 to 15 degrees. Gravity will pull the paint down.
- Load a large brush. A flat brush of 1 inch (25 mm) or a large round brush works. Fill it with color without dripping.
- Paint the first stroke. Start at the top left and pull the brush across to the right, forming a bead of paint along the bottom edge of the stroke.
- Keep going. Reload the brush, then touch the bead with the next stroke and pull across again. Overlap each stroke slightly.
- Pick up the last bead. At the bottom, touch the bead with a nearly dry brush to soak it up.
Leave the wash alone as it dries. The urge to fix a spot is strong, but touching it often creates blooms, those feathery marks that appear when wet paint meets damp paint.
The graded wash
A graded wash follows the same method, but the color gets lighter with each stroke. Start with a strong mix. After the first stroke, dip the brush in clean water, and add a little of that water to your puddle. Repeat after every stroke or two, so the color thins gradually. At the bottom, you should be using almost clear water.
The challenge is to make the change smooth. If you see stripes, you are changing the color too fast. Add less water each time, and keep the strokes quick and light.
Common mistakes
- Blooms: caused by adding water or paint to an area that is already starting to dry. Work fast, and do not go back.
- Streaks: the paper may be too oily or the brush too dry. Wash the sheet gently with clean water and test again.
- A hard edge at the bottom: the bead was not lifted. Dab it with a thirsty brush.
- Buckled paper: the sheet is too thin or too wet. Use heavier paper or tape it down.
Practice and look at old masters
Fill a page with ten small rectangles, five flat and five graded, in different colors. By the end you will feel the right amount of water in the brush. For inspiration, the Library of Congress holds thousands of historical landscape paintings and prints, which you can browse at loc.gov, and many of them rely on the same graded wash for the sky.
Once these two washes feel natural, you can paint a simple sunset, a calm lake, or a stormy sky. Everything else in watercolor builds on them.